
Validity, welcome push, locations and relevant date
Validity and expiration
Open your template in the editor and select the Validity section.
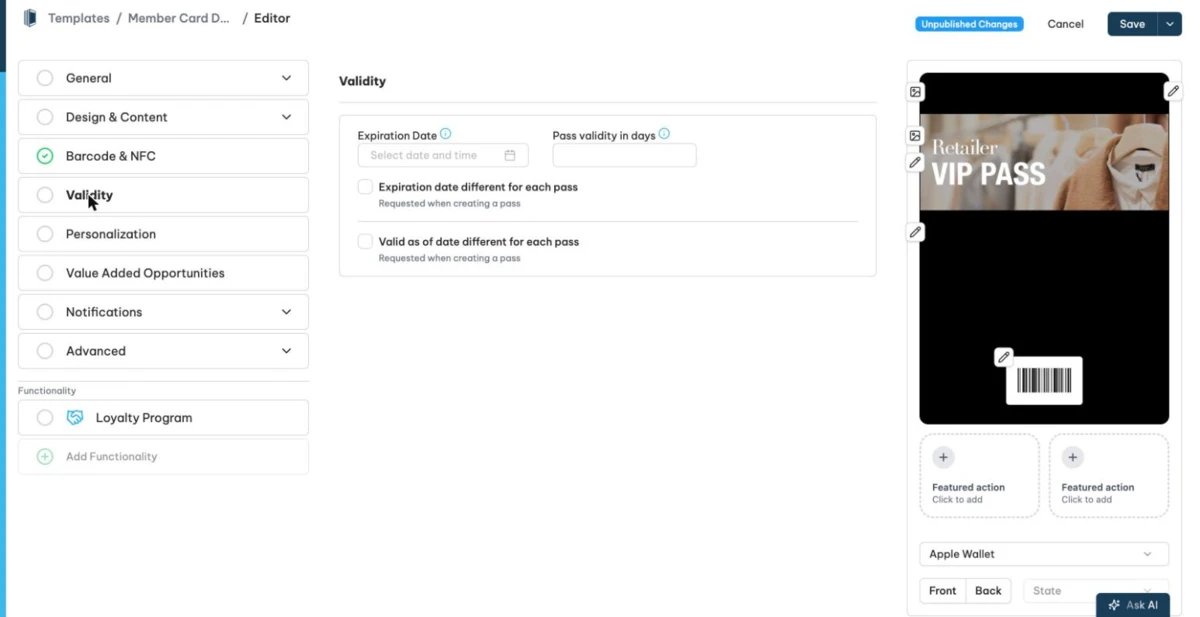
- Expiration Date. A date and time after which passes of this template are invalid. The barcode turns grey and the pass shows a hint. Pass holders do not see the date beforehand.
- Pass validity in days. The number of days a pass stays valid, counted from the creation of the pass.
0means Passcreator ignores the setting. - Expiration date different for each pass. Passcreator asks for the expiration date when you create a pass. Two further options refine this.
- Use Template Expiration Date if pass has no date defined
- Expiration Date of Pass can't be after the Templates Expiration Date
- Valid as of date different for each pass. Passcreator asks for the date from which the pass is valid when you create it.
Welcome push notification
Greet pass holders with a push notification right after they save the pass.
- In the editor menu, open Notifications and select Welcome Notification.
- Enter the message that Passcreator sends as a push notification after the pass holder saves the pass. Insert
{placeholders}from your additional properties to personalize it.
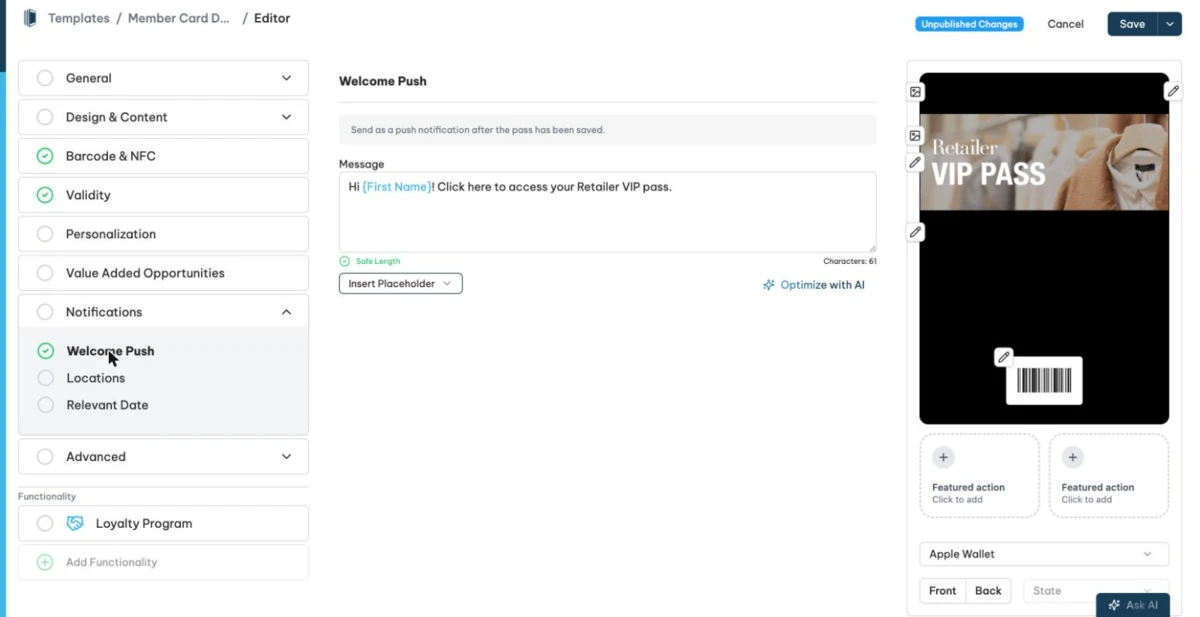
The editor gives live feedback on the length. Messages up to 85 characters are safe. Some old devices cut off messages between 86 and 100 characters, and every device cuts off messages over 100 characters.
Location based notifications
If a phone is within a radius around a GPS coordinate, the pass appears as a notification on the lock screen. This reminds customers of their store card, for example, when they are near your shop.
- In the editor menu, open Notifications and select Locations.
- Add up to 10 locations with a latitude from
-90to90, a longitude from-180to180and the text for the lock screen. - Optionally set a Notification radius. The range is 100 to 1000 m, depending on the pass type.
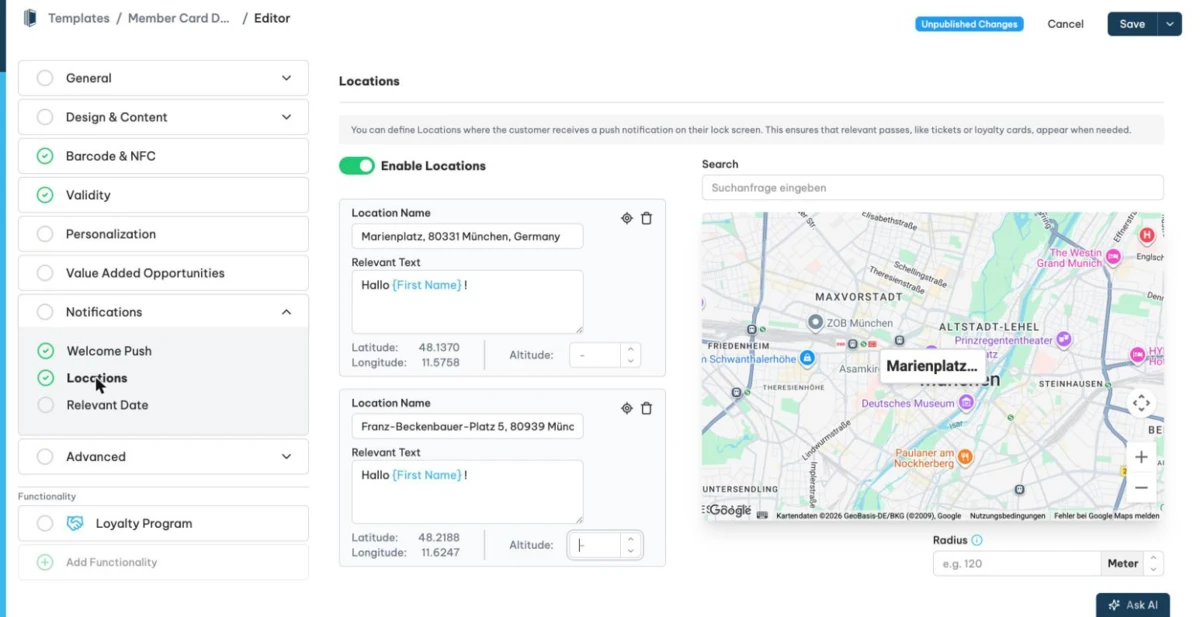
The maximum radius depends on the pass type. You can't specify more than the default radius of the selected type.
| Pass type | Notification radius | Relevant date supported |
|---|---|---|
| Event ticket | Large, 1000 m | Yes |
| Coupon | Small, 100 m | No |
| Store Card | Small, 100 m | No |
| Boarding Pass | Large, 1000 m | Yes |
| Generic | Small, 100 m | Yes |
Samsung Wallet applies the radius in 100 meter steps and caps it at 500 meters. You can also disable location notifications for the template entirely.
Relevant date
When the relevant date arrives, the pass appears on the lock screen of the pass holder, who opens it without searching. This is typical for event tickets and boarding passes shortly before the event or flight.
- In the editor menu, open Notifications and select Relevant Date.
- Set the relevant date, or enable Different Relevant Date for each pass so Passcreator asks for it when you create a pass.
- Optionally enable
Do not include Relavant Date in Apple Wallet passes if a location is provided.
Relevant dates for iOS 18 and later
Besides the classic relevant date you define up to 10 Relevant Dates (iOS 18+) as ranges with a start and an end time via Add Relevant Date. The end time must fall on the same calendar day as the start time and after it. Also set the classic relevant date above to support older operating systems and Google Wallet.
Checked 2026-08-20 · Documentation