
How do I issue employee badges with NFC?
An employee badge is a pass with name, role and photo that staff tap on an NFC reader. Apple approves NFC for Apple Wallet, Passcreator enables it for Google Wallet, and the reader must support Apple VAS and Google Smart Tap. Attended access works, unattended door unlocking does not.
Requirements
- NFC is an optional add on with a one time activation fee. Contact Passcreator if you do not see the NFC options
- For Apple Wallet, an NFC request that Apple has approved and an NDA with Passcreator
- An NFC reader certified for Apple VAS and Google Smart Tap, or the Smart Scan app with a supported USB reader
- A person at the reader. Apple allows third party NFC passes for attended access only
Steps
Request NFC
- Go to
Templates › New Template › Request NFC Pass, or toAccount › NFC requests, and describe your use case. Name the countries, the expected volume, how staff use the badge, your security concept and the reader hardware. - Wait for Passcreator to get in touch. Apple decides on the request, and in most cases Apple declines a repeated request unless the use case changes. Google Smart Tap needs no approval, Passcreator enables it for your account.
- After approval, an NFC certificate marked Managed by Passcreator appears under
Settings › Certificates.
Build the badge
- Create a template with the pass type Generic and fields for name, title and department as additional properties. Use the thumbnail slot for the photo.
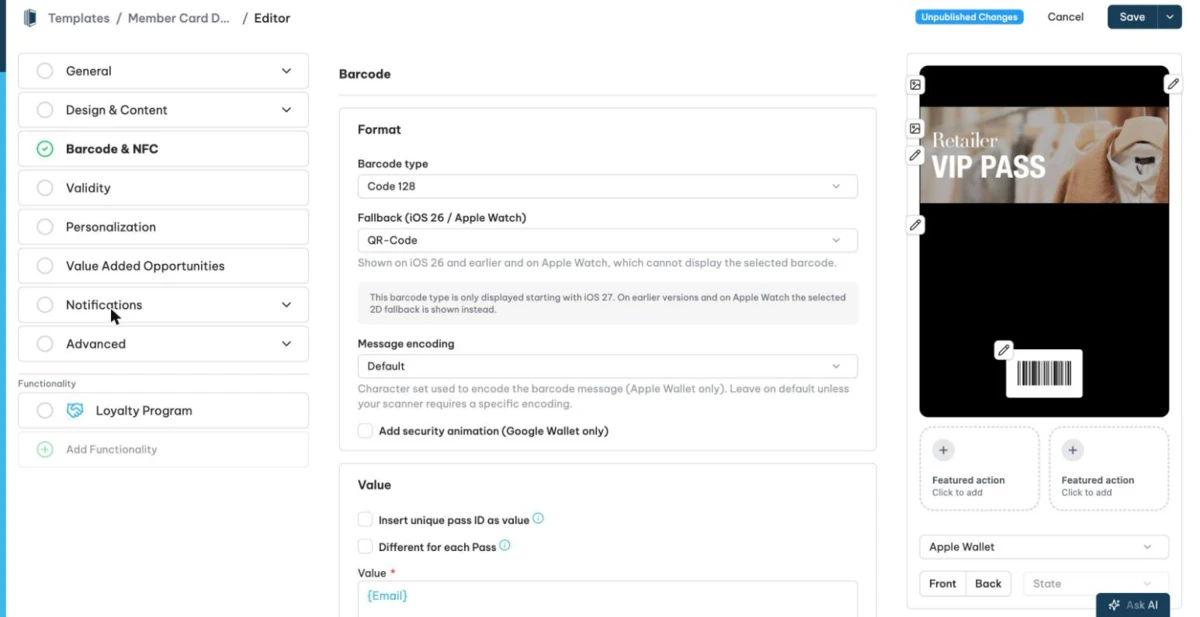
- Under Barcode & NFC, switch on Enable NFC. Keep the barcode fallback so staff at the reader can still scan phones without NFC.
- Set the barcode value to a stable identifier per pass such as
{passUUID}or your personnel number. The barcode value is what the phone transmits on tap. - For badges that grant something, you can switch on
Face ID or Touch ID required (iOS). - Save and publish.
Connect the reader
- Create the first badge. Afterwards the NFC parameters appear under
Integrations › Connected Accountsand in Certificate Management. These are the Google Collector ID, the private key and the Apple VAS keys. - Hand these values to whoever configures the reader. Without them the reader receives encrypted data it cannot decode.
- As an alternative, use the Smart Scan app with a supported USB NFC reader and an app configuration for the badge template.
Hand out and revoke
- Create badges from your HR list with
Passes › Bulk Processingand send them with a sendout, or let your HR system create them through the API. - Bundle the badge with perk vouchers in a project if you want staff to receive everything in one download.
- When someone leaves, void or delete the pass in the pass list. The badge stops working at the reader.
How to check it worked
- A tap with a test badge shows the pass on the phone by itself, and the reader receives your identifier.
- Staff scan a phone without NFC by its barcode instead.
- When you use the Smart Scan app, the tap appears under
Validation › Scanned passes.
If it does not work
Next step
Continue withNFC passes overviewChecked 2026-09-11 · Documentation