
How do I create my first pass?
Requirements
- You need the permission to create templates and passes. If you registered the account yourself, you're a Customer administrator and have everything you need.
Steps
Create a template
- Go to Templates in the sidebar.
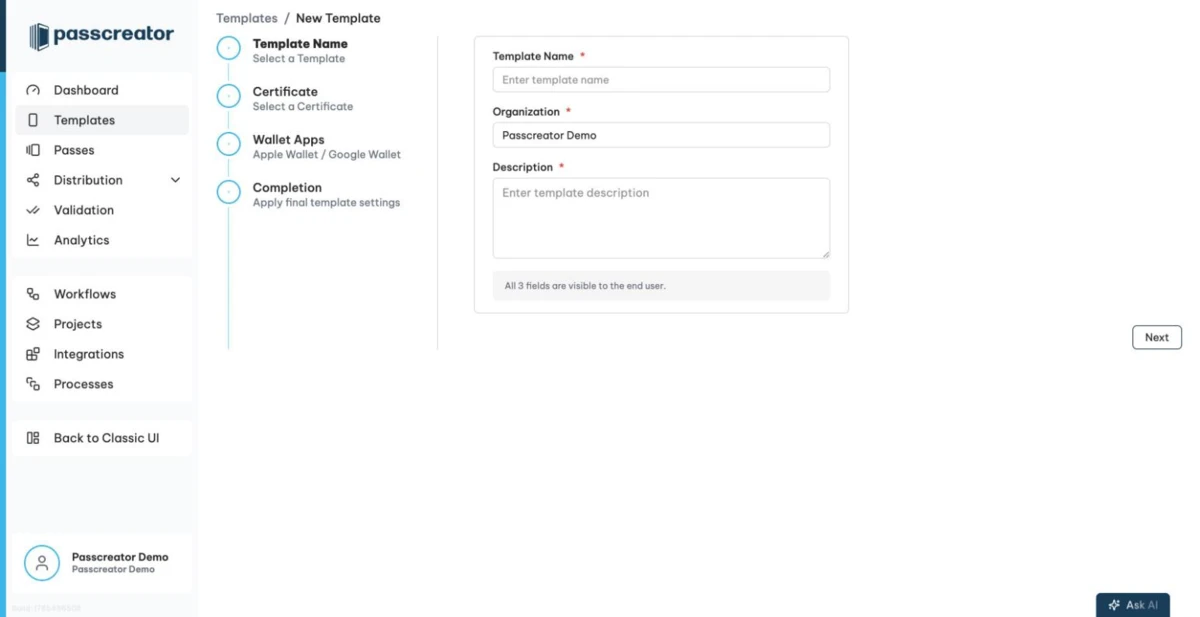
- Click New Template and choose Create new template.... The New Template wizard opens.
- In the Template Name step, enter a Template Name, your Organization and a Description. Passcreator prefills the organization with your company name. All three fields are visible to the end user.
- In the Certificate step, select the certificate that signs your passes. If you don't have your own Apple certificate yet, pick a demo certificate. It lets you create up to 30 passes for testing.
- In the Wallet Apps step, choose the wallet apps for your passes. The wizard always enables Apple Wallet, and Google Wallet is the default for Android. If your account doesn't have a Google Issuer ID yet, the wizard shows a Setup button to activate Google Wallet. You can add more wallet apps later in the editor.
- In the Completion step, upload a Template Icon if your account has no company default that Passcreator applies on its own. The icon appears in push notifications. Then finish the wizard.
You land directly in the template editor. The new template starts as a store card with a default design and a contact field on the back. You can change all of that now.
Adjust the design
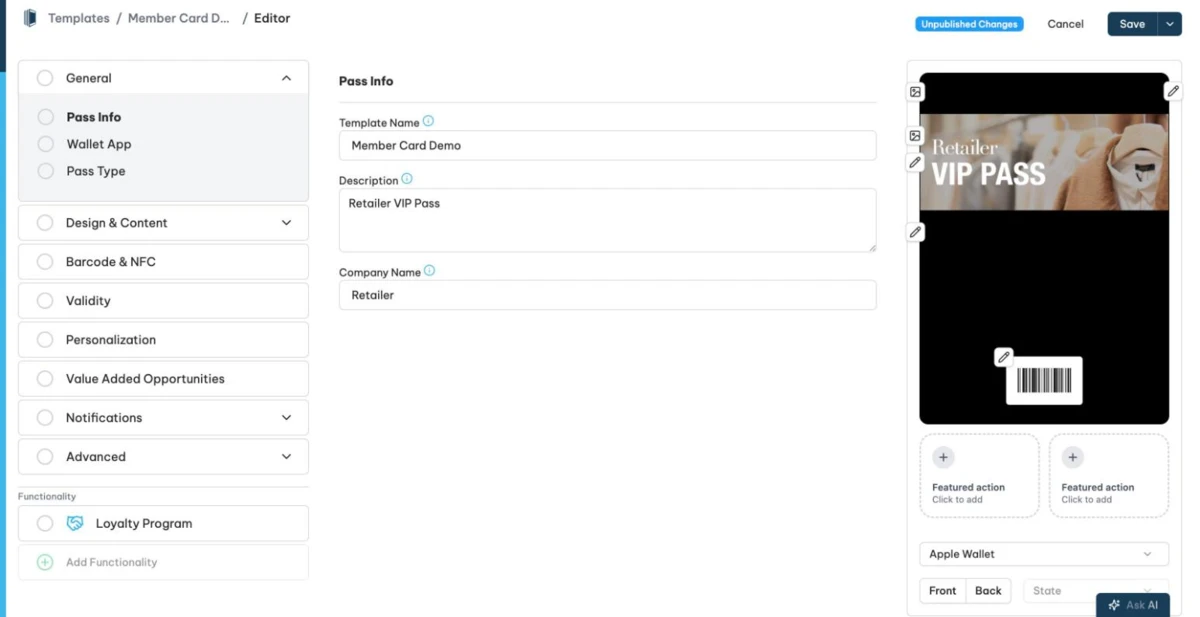
The editor shows a section menu on the left, the form for the selected section in the middle and a live pass preview on the right. Take these steps for your first template.
- Under
General › Pass Info, check name, description and company name. - Under
General › Pass Type, pick a different pass type if a store card doesn't fit your use case. - Under
Design & Content › Colorsand Images, apply your brand colors and upload your logo. - Under
Design & Content › Frontfieldsand Backfields, add the text fields for the front and back of the pass. Every pass needs at least one back field. The Apple EULA also requires contact data on every pass, an email address or a phone number. - Click Save. Saving creates a draft, so your changes are not visible to pass holders yet.
Publish the template
After saving you land on the template details page. It shows the banner "There are unpublished changes. Publish them now or schedule a publication."
- Click Publish changes....
- In the modal you can add a description that only you see, set a Publication time and add a push notification for existing passes. For your first template, leave everything as it is.
- Click Publish.
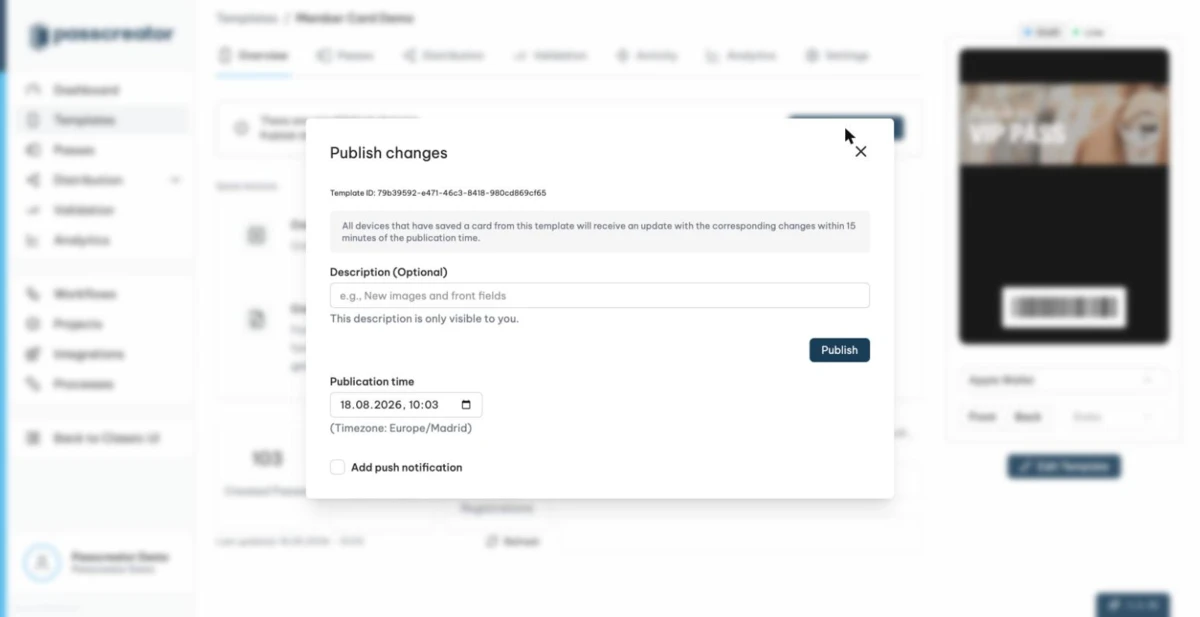
Publishing runs in the background and takes a moment. Devices that already store a pass of this template receive the update within 15 minutes of the publication time.
Create your first pass
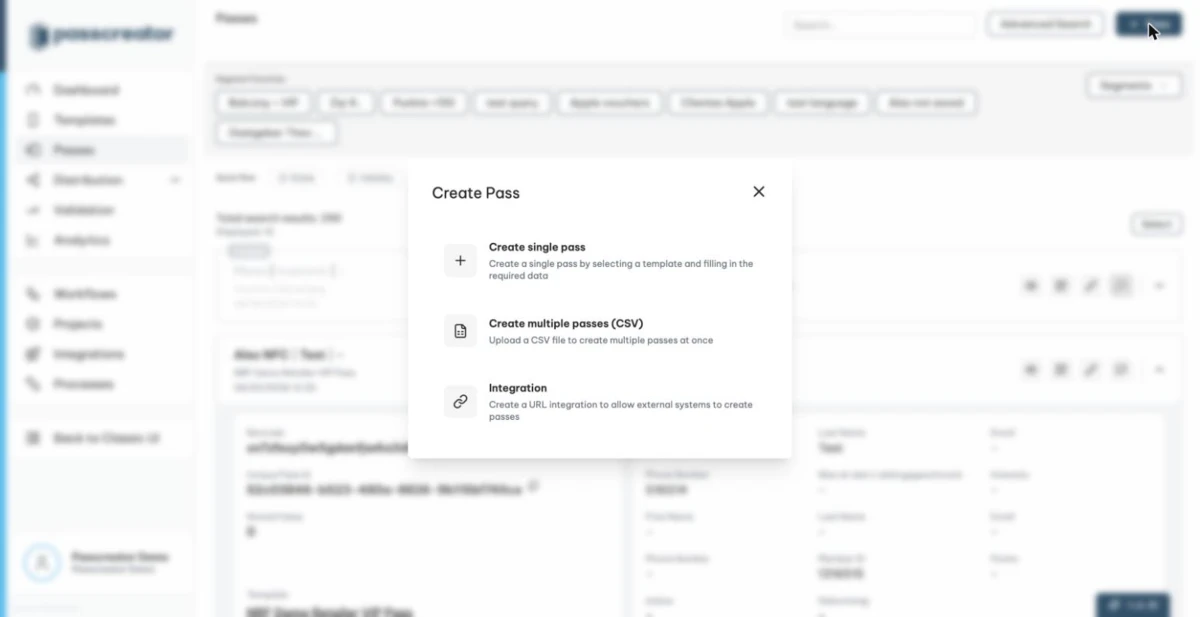
- Go to Passes in the sidebar.
- Click the + Pass button and choose Create single pass.
- Select your template.
- Fill in the requested data. One input appears for each field that your template fills per pass. If the template has none, press Create.
- After creation you see a QR code of the pass download page and the link itself. Scan the QR code with your phone's camera, or copy the link and open it on your phone.
On an iPhone the download page shows Add to Apple Wallet. On Android you'll usually see Save to Google Wallet. Tap the button, and your first pass is on your phone.
Where to go from here
- Overview of the template editor explains all editor sections.
- Bulk processing with CSV files creates and updates many passes at once.
- Sendouts by email or SMS sends passes to your holders.
- Creating a certificate replaces the demo certificate.
Checked 2026-08-20 · Documentation