
Sendouts by email or SMS
Requirements
- You need the sendout privileges to view and create sendouts.
- The Sendout module is active for your account. If it isn't, the Send Passes page shows "The Sendout module is not activated yet" with a button to the sendout settings. See Your own sender address and SMTP for what the settings contain. Activation requires a valid payment method, and Passcreator bills each email and each SMS it sends.
- An additional property of your pass template holds the email address or phone number of your recipients, and passes exist.
- For email sendouts, ideally an email template. If you don't select one, Passcreator uses a default design. Recipients must be able to unsubscribe, either via the automatic unsubscribe link in the sendout settings or an
{unsubscribe_link}in your template. - For SMS sendouts, an SMS sender name configured in the sendout settings.
- You have the consent of all recipients. You are responsible for having the permission to contact them.
Steps
The Send Passes page
Go to Distribution › Send Passes in the sidebar. The list shows all sendout jobs with their type, email or SMS, template, content preview, recipient counts, creation date and status. Possible statuses are Draft, In Progress, Scheduled, Sent and Module not activated.
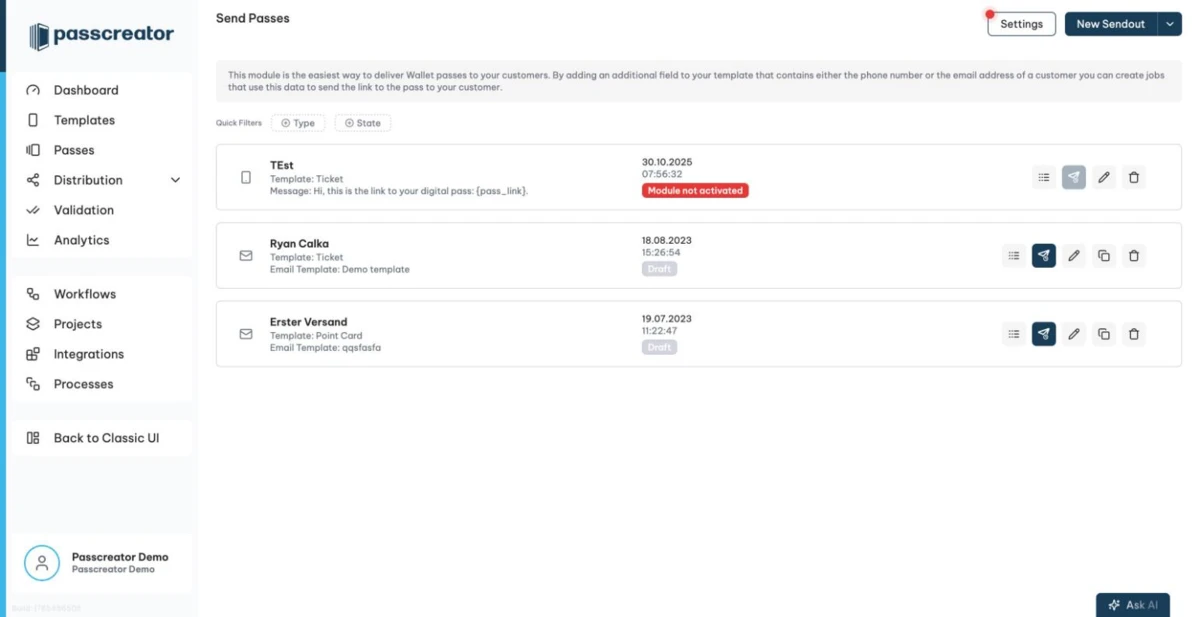
Use the quick filters Type with the values E-Mail and SMS, and State to narrow the list. Sent and running jobs show five statistics circles, Sent, Delivered, Opened for email only, Errors and Skipped. Scheduled jobs show the planned delivery time instead.
Depending on the status of a job, its row offers details, Send Now, Edit Sendout, Duplicate and delete for drafts, and Cancel Sendout for scheduled jobs.
Creating a sendout
- Click New Sendout and choose New Email Sendout or New SMS Sendout. A wizard with four steps opens.
- The General step asks for a Sendout Name and the type,
E-Mailor SMS. You cannot change the type after creation. Duplicate the sendout to switch the type.
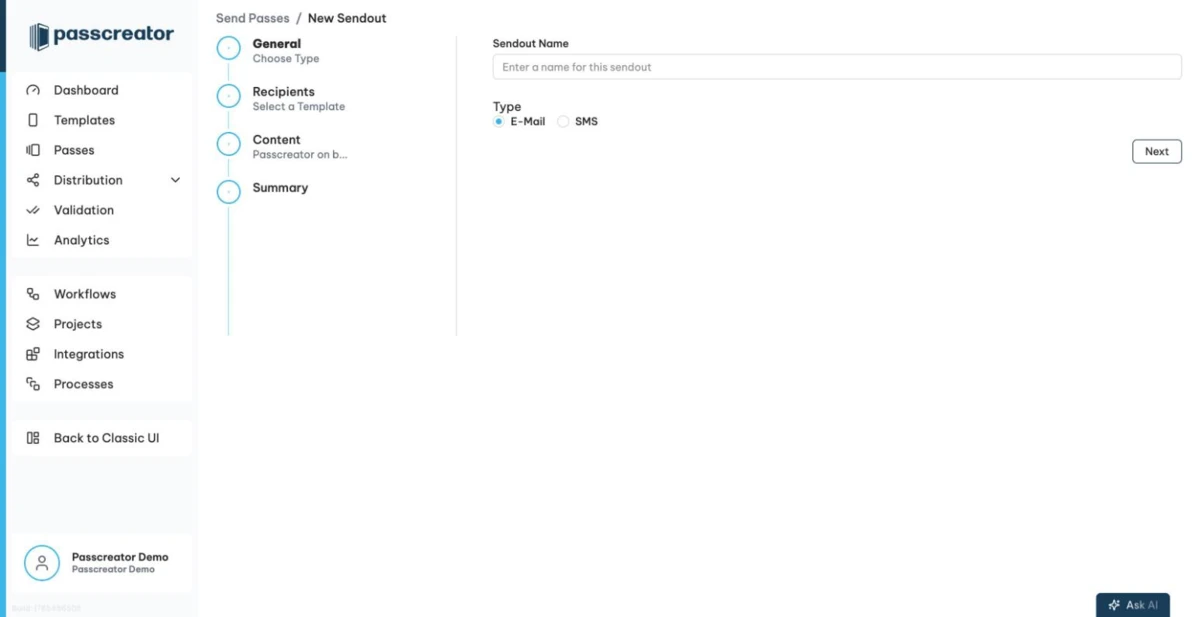
- In Recipients, choose the passes of one template.
- Template is a required field. It is the pass template whose passes receive the message. Unless you have disabled deduplication for the template, Passcreator deduplicates sendouts. Each email address or phone number receives only one message, regardless of how many passes belong to it.
Data Field (Email Address)orData Field (Phone Number)is a required field. It is the pass field that contains the recipient address.- Segment is optional. It narrows the recipients to a saved segment. By default the sendout selects all recipients.
- Bulk Processing Job is optional. It filters the recipients to those whose pass a specific bulk processing job created or last updated.
- In Content, write the message.
- For email, enter the Sender Name, which Passcreator prefills from your sendout settings, the Subject and optionally the Email Template. Many inboxes cut off subjects longer than 60 characters. If you don't select an email template, Passcreator uses a default design.
- For SMS, you cannot change the sender name. It comes from the SMS sender setting of your account. Enter the SMS Text. Typing
{opens autocomplete for pass fields and system and global placeholders. The wizard estimates the number of SMS parts. Because Passcreator replaces placeholders per recipient, the actual length and number of SMS parts can vary.
- In Summary, review name, type, template, data field and content, then click Create. When you edit an existing sendout, the button reads Save Changes.
Creating a sendout produces a Draft. Nothing goes out yet, and only drafts remain editable.
Checking the recipients
Open the details of a draft or scheduled job with the list icon. Before sending, the page shows the passes the recipient criteria currently select. Each pass carries the label Will receive or Will be skipped with a reason. Passcreator evaluates the criteria again at the moment it sends the sendout, so this list can still change. Passes created or updated later that match the criteria also receive the message.
The reason for a skipped pass is one of these messages.
- "This email address has unsubscribed."
- "The data field of this sendout is empty on this pass."
- "This email address is not valid."
Sending or scheduling
- Click Send Now on a draft. The Send Sendout modal opens.
- Deliver it immediately, or tick Schedule sendout and pick a Delivery date. The date must be in the future and at most one year ahead.
- Confirm. The job switches to In Progress or Scheduled and then to Sent.
To stop a scheduled job before it runs, use Cancel Sendout in its row.
After sending
The details page of a sent job shows the statistics circles and a messages table. The table lists each recipient with a status, timestamps, additional info such as subject, location and email client, and a Show History action with the full event timeline of a message. For email, the status is one of Sent, Skipped, Opened, Bounced, Spam and Unsubscribed. For SMS, it is one of Sent, Delivered and Skipped. You can filter by message status and search for a recipient.
Unsubscribes
Click New Sendout › Unsubscribes to manage opt outs. This requires the privilege to manage subscriptions. Users who have unsubscribed no longer receive sendouts. The list shows when and which email address unsubscribed. A Resubscribe button lets you reactivate a recipient by hand so they receive sendouts again.
Next step
Continue withEmail templatesChecked 2026-08-20 · Documentation