
Customizing the scan result screen
After a scan with the Smart Scan app, the app shows the personalized data of the pass. By default, the data appears in the order Passcreator stores it. You control what the app shows on the Validation tab of the template.
Steps
Edit the scan result screen
You configure the scan result screen on the template your passes are based on.
- Go to Templates in the sidebar and open the template.
- Switch to the Validation tab.
- Next to Scan Result Screen, click Edit.
- Enter the text the Smart Scan app shows after a scan of a pass of this template, then save.
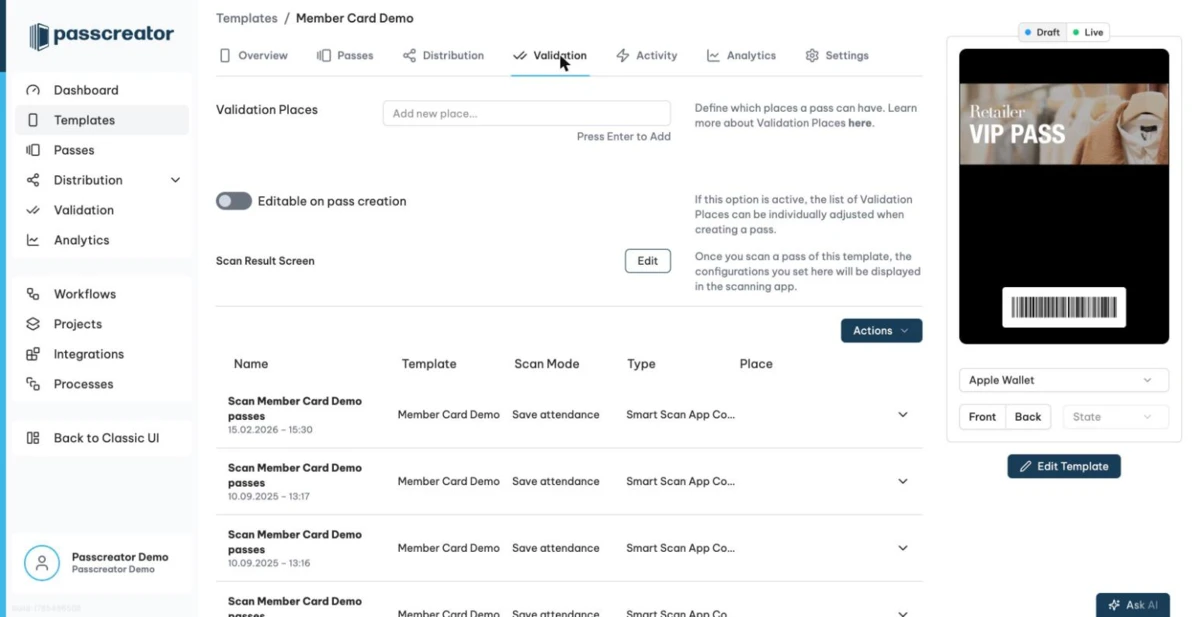
Your text replaces the default data view in the app.
Using placeholders
The text supports {placeholders} that pull in the data of the scanned pass.
- Any additional property of the template, for example
{Firstname}or{Email}. {storedValue}shows the current stored value. Use it for loyalty programs, stamp cards and prepaid cards.{lastUsage}shows the time of the last scan of the pass.
For example, this text greets the pass holder by name and shows their stamp count.
Firstname: {Firstname}
{Firstname} currently has {storedValue} Stamps
Last Scan: {lastUsage}
This way, staff at the door or the register immediately see only what matters, for example the first name and the email address, instead of every stored field.
Next step
Continue withThe Smart Scan appChecked 2026-08-20 · Documentation