
Collecting additional info when scanning
Steps
Add additional properties to an app configuration
You define the fields the app asks for on the app configuration.
- Go to Validation in the sidebar and click Configuration to create a new configuration, or open an existing one.
- In the Create Configuration modal, scroll to Additional Properties and click Add for every field you want to collect.
- Give each field a name and choose its type.
- Unicode/Text accepts free text.
- Double accepts a number. The app automatically shows the numeric keyboard for this field.
- Boolean stores a yes or no value. The app shows a toggle control for this field.
- Fill in the remaining configuration options and click Create.
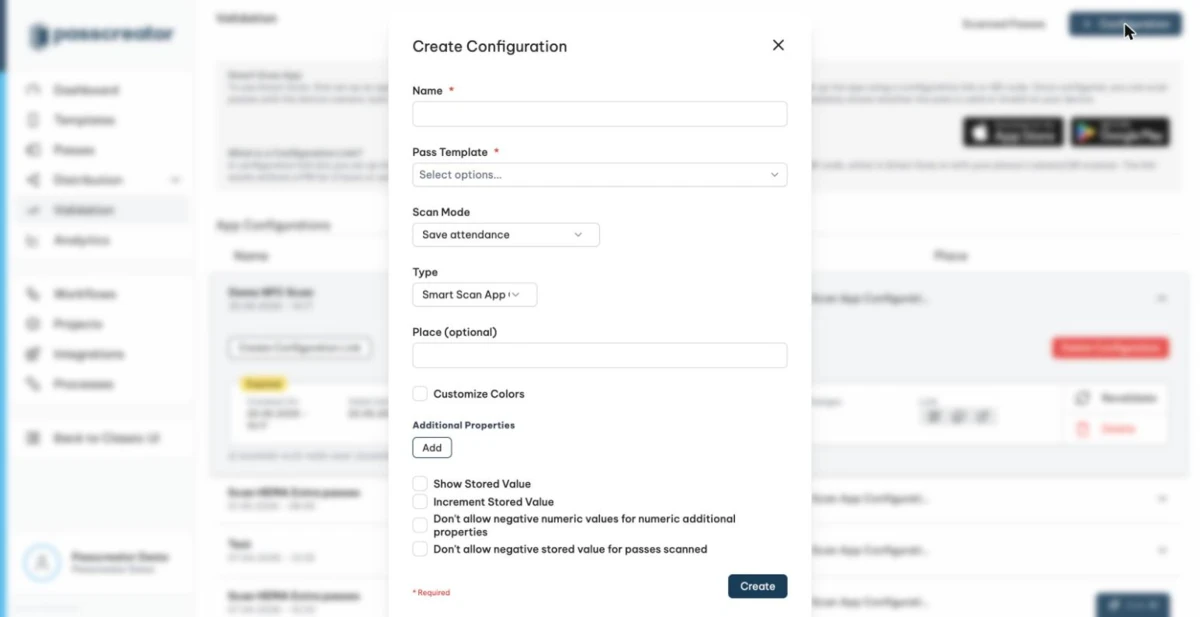
The app shows the field name to your staff, and the type determines how they enter the data.
Next, load the configuration onto your scanning device. Either create a configuration link or QR code and open it on the phone, or log in to the app with your Passcreator credentials and select the configuration. See App configurations and scan modes.
Entering the information while scanning
When you scan a valid Wallet pass that Passcreator knows, the app shows the scan result screen with the status and information about the scanned pass.
Tap Next. The app now asks for the additional properties you defined in the configuration. Enter the information and tap Save. The app uploads the data to the Passcreator servers, and Passcreator stores it together with the scan.
Viewing and exporting the collected data
To see the collected information, open the Validation page and click Scanned Passes in the upper right. This opens the Logs page with the Scanned Passes source selected. Each scan lists the number of captured properties in the Properties column. Use the App Configuration filter to show only scans of a specific configuration.
Click Export Result to download a CSV file. It contains the data of the scanned passes and the information about the scan itself. That covers the time of the scan and the additional properties your staff entered. See Viewing and exporting scan data for details.
Next step
Continue withApp configurations and scan modesChecked 2026-08-20 · Documentation