
Exporting pass data as CSV
You export the data of all passes of a template as a CSV file. The file contains additional properties, identifiers, status and more. Open it in Excel or another tool for further analysis.
Steps
Downloading the CSV file
- Go to Templates in the sidebar and open the details of the template you want to export.
- Switch to the Passes tab.
- Open the Actions dropdown and click Download CSV.
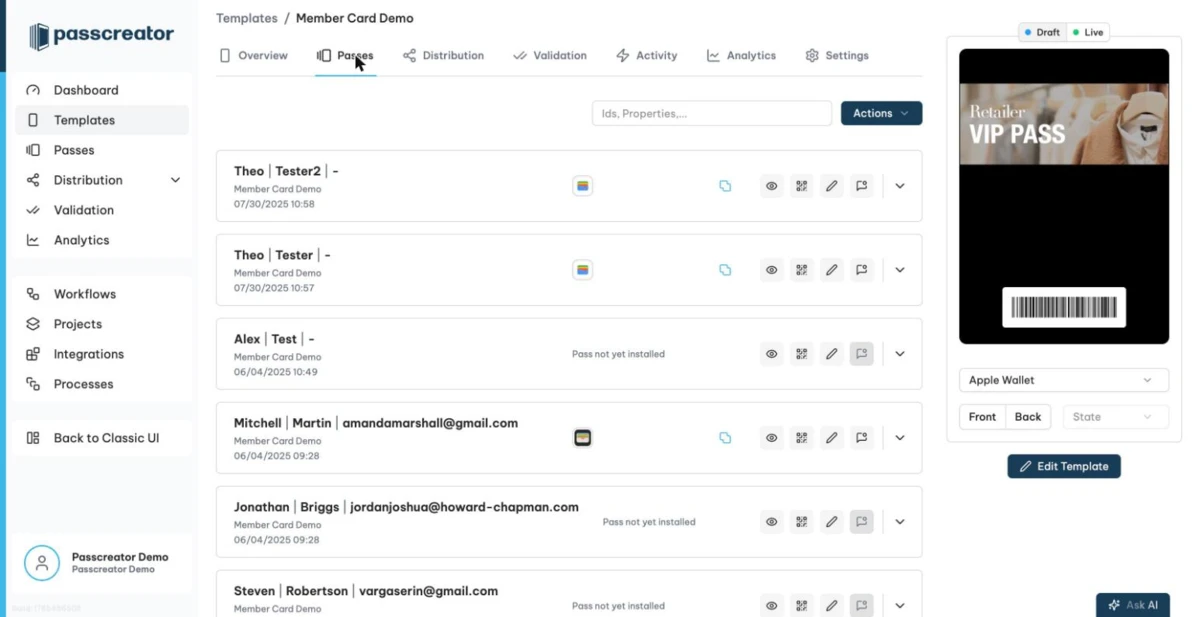
The file contains one row per pass with the pass details of the template. Since it's a standard CSV file, you open it directly in Excel, Google Sheets or Numbers, or process it in your own scripts.
Export formats and the 50,000 pass limit
Passcreator has two export formats. You choose the format for your account under Account › Company › Pass export format. You reach it through the profile menu at the bottom of the sidebar.
- Legacy format carries the description "The original export format. Use this if you rely on the existing field layout." This format exports at most 50,000 passes per template.
Performance-optimizedcarries the description "A faster, optimized export format. Recommended for new accounts." This format has no such limit.
Other ways to get pass data out
- For regular automated exports, set up an FTP export job that uploads a CSV with pass data to your server on a schedule. See Exporting pass data to an FTP server.
- For scan results, export the scans recorded by the Smart Scan app as CSV from the Logs page. See Viewing and exporting scan data.
- With the REST API, you query pass data programmatically, including filtered searches with the search API. See REST API and API keys.
- For used IDs, if the template uses IDs that you uploaded yourself, the Manage IDs page offers Export All Used IDs and
Export Used IDs (last 4 Weeks). See Custom numbers and your own IDs.
Checked 2026-08-20 · Documentation